Testopia is a test case management extension for Bugzilla. It is designed to be a generic tool for tracking test cases, allowing for testing organizations to integrate bug reporting with their test case run results.
In this tutorial we’ll extend Bugzilla with Testopia extension.
1.- Prerequisites.
- Basic Knowledge of Linux Shell Commands.
- Bugzilla properly installed in your system. You can follow this tutorial to install Bugzilla here.
- Download the latest version of Testopia here.
2.- Pre Installation Activities.
Copy testopia-2.5-BUGZILLA-4.2.tar.gz to Bugzilla’s directory:
|
1 |
#cp testopia-2.5-BUGZILLA-4.2.tar.gz /var/www/html/bugzilla/ |
Untar the testopia-2.5-BUGZILLA-4.2.tar.gz file:
|
1 |
#tar xzvf testopia-2.5-BUGZILLA-4.2.tar.gz |
Verify that extensions/Testopia/ directory was created:
|
1 2 3 4 5 6 7 8 9 10 11 12 13 14 15 16 17 18 19 20 21 22 23 24 25 |
# ls -l extensions/Testopia/ total 984 -rw-r----- 1 root apache 87959 May 28 2012 ChangeLog -rw-r----- 1 root apache 1110 May 28 2012 Config.pm drwxr-x--- 3 root apache 4096 May 28 2012 contrib drwxr-x--- 2 root apache 4096 May 28 2012 css drwxr-x--- 4 root apache 4096 May 28 2012 doc -rw-r----- 1 root apache 318 May 28 2012 environment.dtd -rw-r----- 1 root apache 94940 May 28 2012 Extension.pm drwxr-x--- 10 root apache 4096 Oct 1 2010 extjs drwxr-x--- 2 root apache 4096 May 28 2012 img -rw-r----- 1 root apache 1838 May 28 2012 import_example.csv drwxr-x--- 2 root apache 4096 May 28 2012 js drwxr-x--- 4 root apache 4096 May 28 2012 lib -rw-r----- 1 root apache 9359 May 28 2012 README -rwxr-x--- 1 root apache 1139 May 28 2012 run_unit_tests.pl drwxr-x--- 4 root apache 4096 May 28 2012 t drwxr-x--- 3 root apache 4096 May 28 2012 template -rw-r----- 1 root apache 418766 May 28 2012 testopia.all.js -rw-r----- 1 root apache 206950 May 28 2012 testopia.all.ycomp.js -rw-r----- 1 root apache 10954 May 28 2012 testopia.xsd -rwxr-x--- 1 root apache 2063 May 28 2012 testrunner.pl drwxr-x--- 2 root apache 4096 May 28 2012 tools # |
3.- First try to Install Testopia.
Run the ./checksetup.pl command to install Testopia:
|
1 2 3 4 5 6 7 8 9 10 11 12 13 14 15 16 17 18 19 20 21 22 23 24 25 26 27 28 29 30 31 32 33 34 35 36 37 38 39 40 41 42 43 44 45 46 47 48 49 50 51 52 53 54 55 56 57 58 59 60 61 62 63 64 65 66 67 68 69 70 71 72 73 74 75 76 77 78 79 80 81 82 83 84 85 86 87 88 89 90 91 92 93 94 95 96 97 98 99 100 101 102 103 104 105 106 107 108 109 110 111 112 113 114 |
# ./checksetup.pl * This is Bugzilla 4.2.4 on perl 5.8.8 * Running on Linux 2.6.18-308.24.1.el5 #1 SMP Tue Dec 4 17:42:30 EST 2012 Checking perl modules... Checking for CGI.pm (v3.51) ok: found v3.62 Checking for Digest-SHA (any) ok: found v5.80 Checking for TimeDate (v2.21) ok: found v2.24 Checking for DateTime (v0.28) ok: found v0.78 Checking for DateTime-TimeZone (v0.71) ok: found v1.56 Checking for DBI (v1.41) ok: found v1.623 Checking for Template-Toolkit (v2.22) ok: found v2.24 Return::Value is deprecated at lib/Return/Value.pm line 13 require Return/Value.pm called at lib/Email/Send.pm line 11 Email::Send::BEGIN() called at lib/Return/Value.pm line 0 eval {...} called at lib/Return/Value.pm line 0 require Email/Send.pm called at (eval 95) line 1 eval 'require Email::Send;' called at Bugzilla/Install/Requirements.pm line 668 Bugzilla::Install::Requirements::have_vers('HASH(0x8d25ec4)', 1) called at Bugzilla/Install/Requirements.pm line 445 Bugzilla::Install::Requirements::_check_missing('ARRAY(0x8ce3264)', 1) called at Bugzilla/Install/Requirements.pm line 409 Bugzilla::Install::Requirements::check_requirements(1) called at ./checksetup.pl line 86 Checking for Email-Send (v2.00) ok: found v2.198 Checking for Email-MIME (v1.904) ok: found v1.911 Checking for URI (v1.37) ok: found v1.60 Checking for List-MoreUtils (v0.22) ok: found v0.33 Checking for Math-Random-ISAAC (v1.0.1) ok: found v1.004 Checking for JSON (v2.10) ok: found v2.53 Checking for Text-Diff (v0.35) not found Checking for GD-Graph3d (v0.63) not found Checking available perl DBD modules... Checking for DBD-Pg (v1.45) not found Checking for DBD-mysql (v4.001) ok: found v4.022 Checking for DBD-SQLite (v1.29) ok: found v1.37 Checking for DBD-Oracle (v1.19) not found The following Perl modules are optional: Checking for GD (v1.20) ok: found v2.46 Checking for Chart (v2.1) ok: found v2.4.6 Checking for Template-GD (any) ok: found v1.56 Checking for GDTextUtil (any) ok: found v0.86 Checking for GDGraph (any) ok: found v1.44 Checking for MIME-tools (v5.406) ok: found v5.503 Checking for libwww-perl (any) ok: found v6.04 Checking for XML-Twig (any) ok: found v3.26 Checking for PatchReader (v0.9.6) ok: found v0.9.6 Checking for perl-ldap (any) ok: found v0.52 Checking for Authen-SASL (any) ok: found v2.16 Checking for RadiusPerl (any) ok: found v0.22 Checking for SOAP-Lite (v0.712) ok: found v0.715 Checking for JSON-RPC (any) ok: found v1.03 Checking for JSON-XS (v2.0) ok: found v2.33 Checking for Test-Taint (any) ok: found v1.06 Checking for HTML-Parser (v3.40) ok: found v3.55 Checking for HTML-Scrubber (any) ok: found v0.09 Checking for Encode (v2.21) ok: found v2.47 Checking for Encode-Detect (any) ok: found v1.00 Checking for Email-MIME-Attachment-Stripper (any) ok: found v1.316 Checking for Email-Reply (any) ok: found v1.202 Checking for TheSchwartz (any) ok: found v1.10 Subroutine File::Slurp::O_RDWR redefined at lib/File/Slurp.pm line 11 Subroutine File::Slurp::O_CREAT redefined at lib/File/Slurp.pm line 11 Subroutine File::Slurp::O_EXCL redefined at lib/File/Slurp.pm line 11 Checking for Daemon-Generic (any) ok: found v0.82 Checking for mod_perl (v1.999022) ok: found v2.000004 Checking for Apache-SizeLimit (v0.96) ok: found v0.96 Checking for Text-CSV (v1.06) not found Checking for XML Schema Validator (v1.10) not found Checking for XML Schema Parser (any) ok: found v1.01 Checking for XML Twig (any) ok: found v3.26 Checking for mod_headers (any) ok Checking for mod_expires (any) ok Checking for mod_env (any) ok *********************************************************************** * REQUIRED MODULES * *********************************************************************** * Bugzilla requires you to install some Perl modules which are either * * missing from your system, or the version on your system is too old. * * See below for commands to install these modules. * *********************************************************************** * OPTIONAL MODULES * *********************************************************************** * Certain Perl modules are not required by Bugzilla, but by * * installing the latest version you gain access to additional * * features. * * * * The optional modules you do not have installed are listed below, * * with the name of the feature they enable. Below that table are the * * commands to install each module. * *********************************************************************** * MODULE NAME * ENABLES FEATURE(S) * *********************************************************************** * Text-CSV * CSV Importing of test cases * * XML Schema Validator * XML Importing of test cases and plans * *********************************************************************** COMMANDS TO INSTALL OPTIONAL MODULES: Text-CSV: /usr/bin/perl install-module.pl Text::CSV XML Schema Validator: /usr/bin/perl install-module.pl XML::Validator::Schema COMMANDS TO INSTALL REQUIRED MODULES (You *must* run all these commands and then re-run checksetup.pl): /usr/bin/perl install-module.pl Text::Diff /usr/bin/perl install-module.pl GD::Graph3d To attempt an automatic install of every required and optional module with one command, do: /usr/bin/perl install-module.pl --all *** Installation aborted. Read the messages above. *** As you can see there some Perl dependencies that we need to install first, so lets do it. |
4.- Install Perl Dependencies
Test::Diff.
To Install Test::Diff run the following command:
|
1 |
#/usr/bin/perl install-module.pl Text::Diff |
GD::Graph3d.
To Install GD::Graph3d run the following command:
|
1 |
#/usr/bin/perl install-module.pl GD::Graph3d |
Text::CSV.
To Install Text::CSV run the following command:
|
1 |
#/usr/bin/perl install-module.pl Text::CSV |
XML::Validator::Schema.
To Install XML::Validator::Schema run the following command:
|
1 |
#/usr/bin/perl install-module.pl XML::Validator::Schema |
5.- Second Try to Install Testopia.
At this time we have all the Perl missing libraries that we need to install Testopia, so run the ./checksetup.pl again:
|
1 2 3 4 5 |
#./checksetup.pl checksetup.pl complete. # |
Voilà! Your Testopia installation is complete, as simple as that.
6.- Restart Apache
Restart Apache to reflect the changes.
|
1 |
#service httpd restart |
7.- Test Testopia Installation
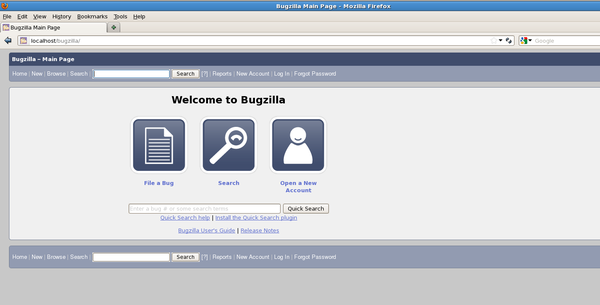
Go to http://localhost/bugzilla/ in your browser to the Bugzilla’s home page.
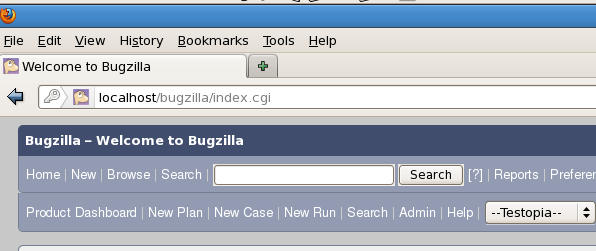
At first you may not see any changes but once you are logged in, you’ll see a new toolbar with the Testopia functionality.
Enjoy!


